Sunday 28 February 2010

Art With Heart Bloh Hop

This morning after breakfast, I took a seat out in the courtyard with my laptop and my coffee, and spent a wonderfully inspring hour or so blog hopping and checking out the wonderful creations of some of the members of the Art With Heart SU team. This blog hop had an easter theme, and it really was fantastic looking at everyone's take on all things Easter..

Whether you make it in time for the hop's blog candy or not - I urge you to take a visit. (I've listed all the stops along the way in case you get lost), It's a really lovely way to see diffrent styles and grab more than a few great ideas!

Just a warning however - if you're anything like me, you'll have massive chocolate cravings!

Enjoy, I sure did! :


Christine Blain


Thursday 25 February 2010

Using Scraps, Bits & Bobs

Many moons ago I was given a gift of handmade recycled note paper which was really beautiful, but difficult to write on. I always loved the natural fibres but couldn't find a really constructive way to use it - well that is until I caught the card-making bug...!

Here I used a half-sheet that has the skeleton leaf on it, and mounted it simply on complimetary textured cardsock, remounted on SU chocolate chip. The ribbon was the dregs from the end of the roll (hence why it was too short, so a snip or two off the edges later, I affixed it with vintage style brads that had come with embelishments I already had used for something else and it was all done.

Its so satisfying when you can whip up a card but still be happy with it. That said, next time I think I would cut the recycled papr smaller and leave more room for the textured card to be torn, I think it would look less cramped. (As if needed another excuse to spend some more stolen moments cardmaking!)

Happy crafting ... and thank you to all the lovely ladies who have posted on my blog lately, it was a wonderful welcome to blogland - and given how beautiful your collective work is, I was honestly really chuffed that you liked some of my work :)

Wednesday 24 February 2010

New tools are so much fun!

Amongst my new stash of goodies, was a heat gun and embossing powders. In fact, I've been accumulating so many goodies lately, my darling husband and I spent last weekend putting together my new craft storage area (ikea to the rescue) .. keep an eye out for pics, I'm so wrapped with how it turned out!

Well of course when you get anything new, If you're anything like me, you have to bust it out and use it! Here I made a simple note card using the same stamps I already had out (snowflake and circular frame from the vintage labels) I just added the little mini snowflake from the SU short and sweet word set. I versamarked each colour, embossed it and set it, before moving on to the next one. Made life much easier than trying to control embossing powder!

I made a few of these notecards in the end... good all-rounders I thought! Hope you agree.....

Tuesday 23 February 2010

Time to sparkle!

The ease of the 2-way glue meant that I got a little trigger happy wth the glue and glitter theme...  I had a simple flourish stamp (this would look even better if I had the florish one from SU's batik motifs! - hint hint honey!) and I just used my stamp-a-ma-jig to position the florish to look like patterned paper from Florence. After stamping in choc chip, I traced over some parts with the 2 way glue and added the glitter to it... chopped out my favourite bits into a square, stuck it on the ruby red card and tore off the bottom. Bang on a knotted ribbon in chic chip and stuck onto choc chip cardsck, and it was made pronto! I hope you like it...

Sunday 21 February 2010

Sale-A-Bration

As a result of a little shopping spree ($100) with Sue my SU demonstrator, I managed got a free stamp set from the SaleABration catalogue! I chose vintage labels, it's so versatile and I've had so much fun trawling though everyone's blogs and sites who've been using the sets as inspiration.

I really am addicted to my favourite few SU colours - chocolate chip, old olive, ruby red and ballet blue, as you might have seen, my cards usually involve some or most of these!

I bought a snowflake stamp for $3 at Christmas from Riot Art and it's ben really versatile for snowflakes or just for embellishments generally. In this card, I stamped the snowflake and the circle from vintage labels in old olive and chocolate chip. After letting the image dry a little, I just ran my 2-way glue pen over selected images, and then added some clear glitter (mine was Martha Stewart fine glitter but SU dazzling diamonds would be great for this). I think it really helped to lift it. I made an A5 sheet of it, and then just punched out bits of the images with my square punch.


I made the card with SU Kraft paper, with the old olive matting to the chocolate chip base. The old olive grosgrain ribbon is so easy to work with and since I'm not uch of a bow-maker, I took the simple knot option! The greeting is SU short and sweet stamped in old olive and sponged for effect... 

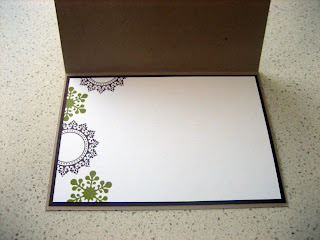
For the insert, I wanted to follow through with the pattern (minus the glitter) so this is what I came up with...


Now that I'm happy with the design, these would be easy to make in multiples!
Happy stamping :)


Saturday 20 February 2010

Japanese Doll Voucher Holder

One weeknight last week I was having trouble sleeping with the stifling heat, and I decided to make a voucher holder card for one of my best friend Anastasia's upcoming birthday. She loves the little japanese dolls, so here's what I came up with...


It's just basic black SU cardstock matted with whisper white and old olive. The stamp is from Hero Arts and stamped on whisper white and coloured in with markers. The grosgrain stitched ribbon is from my local $2 store (gotta love those places!). I dry embossed the WW cardstock inside where the greeting goes just to give it some extra oomph as I thought it was otherwise lacking something.(I found the Fiskars dry embossing template for under $20 at Aldi's of all places!) It makes lining them all up dead easy! The voucher sits inside the little pocket attached with a glue dot and the hole near the pocket was simple to make with my circle punch.


And just because she's extra special, I decided to make a matching envelope...

Thankfully it was a hit !

Sunday 7 February 2010

101 ways with Live Like You Mean It

In December 08 I met a wonderful and talented woman called Sue Madex, who is an independant Stampin Up demonstrator who lives locally to me. I found her blog by accident whilst browing the net for ideas, and went along to one of her classes... (the first of many!) Check out my favourite links to Sue's page. In any event, Sue got me started with a few basic tools and papers, and even though I would have loved to have bought the majority of what was in the catalogue, I bought enough stuff to earn me my first free Hostess set - Live Like You Mean It. Given it was one of my only stamp sets to begin with, it wasn't too suprising that I used it over and over in different ways... Here's another which was a favourite of tweens and adults alike... Here I've used a chocolate base card I bought at Target on sale (I'm sorry I can't remember the brand name, but I know it wasn't Kaisercraft). The panels are stamped on whisper white with old olive, pumpkin pie and ballet blue (SU) and then mounted in the matching cardstock. The ribbon is chocolate double-stitched grosgrain that I bought from the local $2 shop. Well best be off, we have industrial masonry shelving to put up in the garage.. if our marriage survives this, it will survive anything! hehe

Saturday 6 February 2010

My first ever post!

I thought that for my first ever post, I'd take a photo one of the first cards I made, a card for a baby boy. I loved the idea of a little jumpsuit, but wanted something smallish to affix to a gift but still amount to a stand-alone card... this is how I fared... Created using largely Stampin Up! products: Ballet Blue cardstock, The flower from the Live Like You Mean It Hostess Level 1 stamp, stamped on whisper white. The embellishments are half pearls.